Introduction
CS 148 is an introduction to core topics in the modeling and control of autonomous robots. This course focuses on the development of “brains for robots”. That is, given a robot as a machine with sensing, actuation, and computation, how do we develop programs that allow the robot to function autonomously? Such programs involve the robot's perception of its world, decision making towards some objective, and transforming decided actions into motor commands. These are functions commonly used in modern robotics, such as for the PR2 (below).
This year, CS148 projects will model and control robots through projects written in JavaScript/HTML5. These projects will be supported by the 3jsbot code stencil, which uses threejs for in-browser 3D rendering, and 2D simulation code stencils using the jsfiddle development environment. We will roughly follow software models from the Robot Operating System (ROS) robot middleware framework, such as the URDF kinematic modeling format. Projects will cover basic physical simulation, proportional-integral-derivative control, 3D geometric transforms, compositions of matrix transforms, forward kinematics, axis-angle rotation by quaternions, inverse kinematics, simple collision detection, and RRT motion planning, along with coverage of potential field navigation, Monte Carlo localization, and Newton-Euler dynamics.
Instructor
Chad Jenkins
Office: CIT 327
Office Hours
Monday 1-2:30
Thursday 1-3 (when not conflicting with travel)
Meeting time/place
Monday 3:00-5:20 (M Hour) in CIT 368
Mailing list
Prerequisites
Any one of the following: CS15, CS17, CS19, or permission from the instructor
CS 15, 17, or 19 should provide an adequate programming background for the projects in this course. In addition, motivated students who have taken CS 4 should consult with the instructor before enrolling in CS148. Interested students who have not taken any of these courses at Brown, but have some other strong programming experience should consult with course instructor.
Highly Recommended: Linear alegebra
Recommended: Differential equations, Computer graphics, Computer vision, Artificial Intelligence
I will do my best to cover the necessary material, but no guarantees. Linear algebra will be used extensively for representing 3D geometric transforms. Computer graphics is helpful for under-the-hood understanding of threejs. Computer vision and AI share common concepts with this course. Differential equations are used to cover modeling of motion dynamics and inverse kinematics, but not explicitly required.
Textbook
Robot Modeling and Control
Mark W. Spong, Seth Hutchinson and M. Vidyasagar
Wiley, 2005
Available at Amazon
Optional texts
JavaScript: The Good Parts
Douglas Crockford
O'Reilly Media / Yahoo Press, 2008
Principles of Robot Motion
Howie Choset, Kevin M. Lynch, Seth Hutchinson, George A. Kantor, Wolfram Burgard, Lydia E. Kavraki and Sebastian Thrun
MIT Press, 2005
Projects and Grading
There will be 8 projects in CS148: 7 programming assignments and 1 oral/written assignment. CS 148 projects are graded as “checked” (completed) or “not checked” (incomplete). To receive an A grade in the course, you must have all assignments checked by the end of reading period. For a B grade, 6 assignments must be checked. Less than 6 checks will result in no credit for the course. The timing and due dates for these projects will be announced on an ongoing basis. Git repositories will be used for project implementation, version control, and submission. Project implementations are submitted as branches in your assigned repository. These branches must be submitted prior to the due date for each assignment. Your implementation will be checked out and executed by the course staff. You will be notified by the course staff whether your implementation is sufficient for checking off the assignment. If your assignment is insufficient for receiving a check, your group is allowed one regrade (per assignment) with 2 weeks of notification. If deemed necessary, the course staff may require an interactive demonstration of your implementation and/or a web-based written report.
Final Grading
All grading will be finalized on May 11, 2015. Regrading of specific assignments will be done upon request during office hours. No regrading will be done after grades are finalized.
Repositories
The course staff will provide a git repository (through github) for each student group to check in project source code and reports, unless you request using separate service or repository. Please refer to this tutorial for an in-depth introduction to git and version control. Although it has a coarse language choice, this is also a great and accessible tutorial. We expect students to use these repositories for collaborative development as well as project submission. It is the responsibility of each student group to ensure their repository adheres to the Collaboration Policy and submission standards for each assignment. Submission standards and examples will be described for each assignment.
Late Policy
Do not submit assignments late. The course staff reserves the right to not grade late submissions.
200-Level Credit
CS148 cannot be taken for 200-level (graduate) credit. Please direct questions about policies and procedures for graduate credit to the CS Director of Graduate Studies.
Collaboration Policy
This policy covers all course material and assignments unless otherwise stated. Course material, concepts, and documentation may be discussed with anyone. Assignments may be discussed with the other cs148 students at the conceptual level. Discussions may make use of a whiteboard or paper. Discussions with others (or people outside of your assigned group) cannot include writing or debugging code on a computer or collaborative analysis of source code that is not your own. You may take notes away from these discussions, provided these notes do not include any source code. The code for your implementation may not be shown to anyone outside of your group, including granting access to repositories or careless lack of protection. You do not need to hide the screen from anyone, but you should not attempt to show anyone your code. When you are done using any robot device such that another group may use it, you must remove all code you have put onto the device. You may not share your code with others outside of your group. At any time, you may show others the implemented program running on a device or simulator, but you may not discuss specific debugging details about your code while doing so. Should you fail to abide by this policy, you will receive no credit for this course. Brown also reserves the right to pursue any means necessary to ensure compliance. This includes, but is not limited to prosecution through Brown University’s Student Conduct Procedures, which can result in your suspension or expulsion from the University.
Tentative Schedule (subject to change)
- Introduction, Motors and Sensors, Basic JavaScript (Chapter 1) Slides
- Assignment 1 out: Getting started
- Lagrangian equations of motion for simple pendulum, Linear alegbra refresher Slides (Refresher)
- Numerical integrators: Euler, Verlet, Runge-Kutta 4, Lagrangian equations of motion for simple double pendulum, Slides (Dynamics)
- Assignment 1 due: Getting started
- Assignment 2 out: Simple pendulum
- Basic motion control, Proportional-Integral-Derivative control Slides (Controls)
- Generalized coordinates and joint angles Particle simulation with optimized constraints Spring and ground constraints Slides (Dynamics/Constraints)
- No class. Long weekend break.
- Assignment 2 due: Simple pendulum
Assignment 3 out: Pendularm- Robot Kinematics, URDF, 2D transforms, 3D transforms (Chapter 2) Forward Kinematics, Matrix Stack (Chapter 3), Quaternions; Not covered: D-H notation Slides (Forward Kinematics)
- Assignment 4 out: Forward kinematics: draw robot
- Forward Kinematics (continued)
Assignment 3 due: Pendularm- Inverse kinematics, Geometric Jacobian, Pseudo Inverse (Chapter 4) Slides (Inverse Kinematics)
- Assignment 4 due: Forward kinematics: draw robot
- Assignment 5 out: Forward kinematics: quaternions
- Robot Decision Making, Motion Planning, Bug Algorithms, Probabilistic Roadmaps, RRT Connect (Chapter 5), Axis-aligned collision detection, Finite State Machines, Subsumption Architecture, Potential Fields
- Handout: RRT-Connect: An Efficient Approach to Single-Query Path Planning by Kuffner and LaValle, ICRA 2000.
- No class. Spring Break.
- Decision Making and Motion Planning (continued) Slides (Decision Making and Motion Planning)
- Assignment 5 due: Forward kinematics: quaternions
- Assignment 6 out: Inverse kinematics
- Potential Fields (Chapter 5), Lagrangian multipliers, Generalized coordinates and joint angles, Particle simulation with optimized constraints, Spring and ground constraints Slides (Dynamics/Constraints)
- Robot Perception, Monte Carlo Localization, Simultaneous Localization and Mapping, Range Sensing, 2.5D Point Clouds, Moving Least Squares
- Assignment 6 due: Inverse kinematics
- Assignment 7 out: Motion planning
- Robotics Lab Demos, Regrading and makeup session
- Assignment 8 out: Best use of robotics?
- Robot Middleware, rosbridge and Robot Web Tools, Quad rotor helicopter programming Regrading and makeup session
- Assignment 7 due: Motion planning
- Student presentations
- Assignment 8 due: Best use of robotics?
- Grading finalized
Week 1
Week 2
Week 3
Week 4
Week 5
Week 6
Week 7
Week 8
Week 9
Week 10
Week 11
Week 12
Week 13
Week 14
Week 15
Week 16
Slides from this course borrow from and are indebted to many sources from around the web. These source include a number of excellent robotics courses:
Assignment 1: Getting familiar with 3jsbot
Due 9am, Monday, February 2, 2015
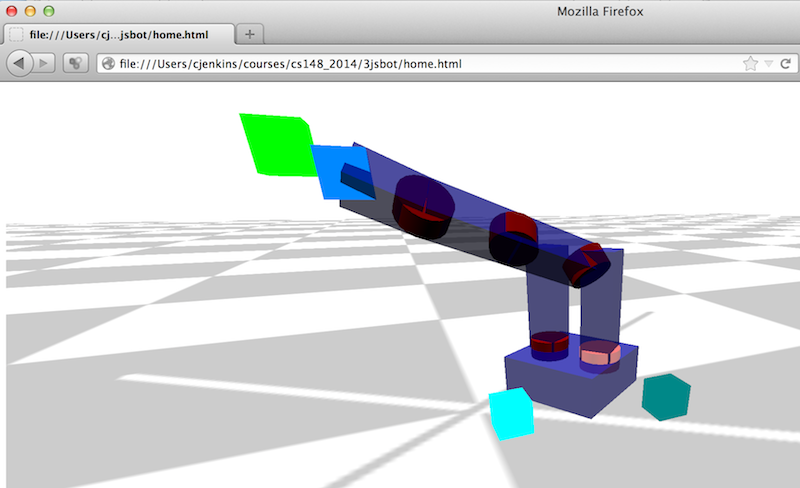
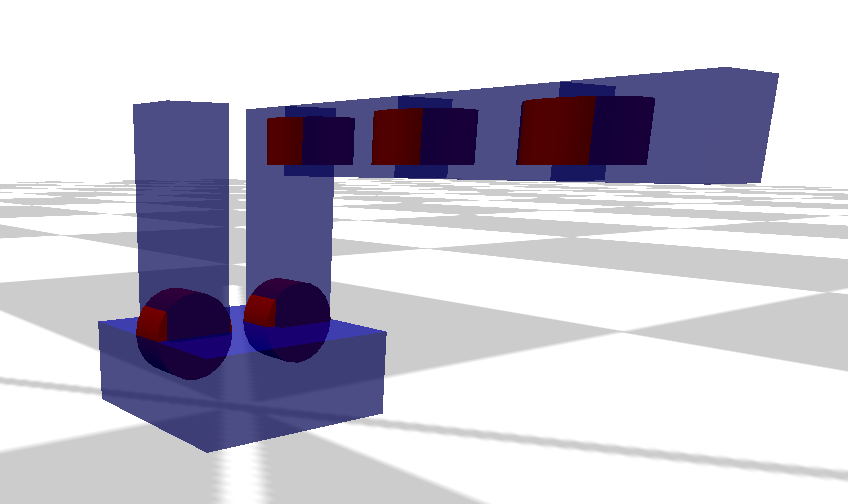
In this assignment, you should clone the 3jsbot_stencil repository as your working repository for the course. 3jsbot_stencil contains a code stencil for this assignment as well as all projects in the course. If you open "home.html" in this repository, you should see the jittering disconnected pieces of a robot (described in "robots/br2.js"), similar to the follwing snapshot:
Your task is to make these objects responsive to keyboard commands, specifically to move upward and stop/start jittering (although more is encouraged). To do this, you will modify "home.html" within the sections delimited by "// CS148: INITIAL GETTING FAMILIAR CODE". These sections also include code examples meant to be a quick (and very rough) introduction to JavaScript, assuming programming competency in another language.
To ensure proper submission of your assignments, please do the following:
- email the course instructor (ojenkins addrsign brown) with your name, email address, and pointer to your repository,
- ensure the course instructor knows what repository you are using, and your branch is created and not modified past project deadlines
- ensure the instructor has read/commit access to your repository, which can be confirmed/addressed through email or office hours
For turning in your assignment, create a branch in your repository labeled "Assignment-1". The "Assignment-1" branch is essentially a tag and should not be merged back into the master. You should work from the master.
Assignment 2: Simple pendulum
Due 9am, Monday, February 16, 2015
UPDATE: Due 9am, Thursday, February 19, 2015
To get a sense of physical dynamics and control, your task is to implement a physical simulator and servo controller for a frictionless simple pendulum with a rigid massless rod, and then control this system as a 1 DOF robot with a single motor. The code stencil for this pendulum example has been placed in the 3jsbot_stencil repository.
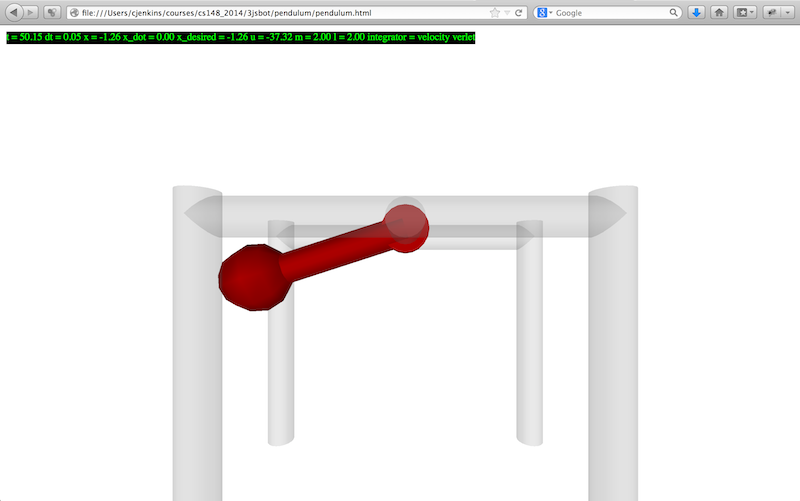
For physical simulation, you will implement two numerical integrators (Euler's Method and Velocity Verlet) for a pendulum with parameters specified in the code stencil. The numerical integrator will advance the state (angle and velocity) of the pendulum in time given the current acceleration (generated from the pendulum equation of motion). If implemented successfully, this ideal pendulum should oscillate about the vertical (where the angle is zero) proportional to the pendulum's initial angle.
For motion control, you will implement a proportional-integral-derivative controller to control the system's motor to a desired angle. This PID controller should output control forces integrated into the system's dynamics. You will need to tune the gains of the PID controller for stable and timely motion to the desired angle for pendulum with parameters: length=2.0, mass=2.0, gravity=9.81.
For user input, you should be able to use the 'q' and 'e' keys to decrement and increment the desired angle of the 1 DOF servoed robot arm, and hold down the 's' key zero the robot's controls and allow it to swing uncontrolled.
For turning in your assignment, create a branch in your repository labeled "Assignment-2".
Assignment 3: Pendularm
CANCELLED
Due 9am, Monday, March 2, 2015
Due to the scheduling issues imposed by weather conditions, this assignment has been cancelled for the current semester. If you are interested in implementing this assignment (because it is cool), please see the course instructor.
For turning in your assignment, create a branch in your repository labeled "Assignment-3".
Assignment 4: Forward Kinematics: Draw Robot
Due 9am, Monday, March 16, 2015
UPDATE: Due 9am, Monday, March 9, 2015
In this assignment, you will render the forward kinematics of a robot, given its kinematic specification (in the "robots" subdirectory). To render the robot properly, you will compute matrix transforms for each link and joint of the robot based their hierarchical configuration. We will assume the joints will remain in their zero position, saving joint motion for Assignment 3. Each file in the robots subdirectory contains code to create a robot data object and initializes this object with the kinematic description of a robot (as well as some meta information and rendering geometries). This kinematic description defines a hierarchical configuration of the robot's links and joints. This description is a subset of the Unified Robot Description Format (URDF), as described in this tutorial. From this initialization, you should extend the robot object to:
- complete the kinematic hierarchy to specify the parent and children of each link, by modifying the init_robot_joints() function in home.html.
- include "3jsbot_forward_kinematics.js" and "3jsbot_matrix.js" in home.html
- invoke traversal of forward kinematics, by uncommenting robot_forward_kinematics() in my_animate() in home.html
- implement matrix support routines in 3jsbot_matrix.js
- implement recursive traversal of joints and links 3jsbot_forward_kinematics.js, starting from robot_forward_kinematics(), to compute transformation matrices for:
- robot.origin.xform: global position and orientation of robot
- robot.links[xx].xform: transform of link in global coordinates
- robot.joints[xx].origin.xform: transform of joint origin in global coordinates
- robot.joints[xx].xform: transform resulting from joint rotation in global coordinates.
- For this assignment, robot.joints[x].xform equals robot.joints[x].origin.xform times the identity matrix (i.e., no rotation of the joint)
- for each link and joint, set its transformation for rendering by coverting the transform to the threejs format and applying it to the associated threejs geometry (.geom), such as:
    var tempmat = matrix_2Darray_to_threejs(robot.joints[xx].xform);
    simpleApplyMatrix(robot.joints[xx].geom,tempmat);
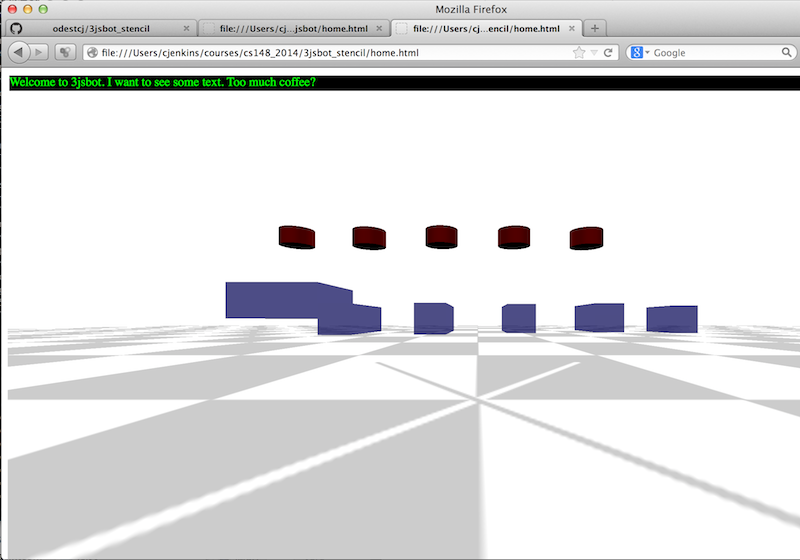
If implemented properly, the robot_urdf_example.js example should produce the following rendering:
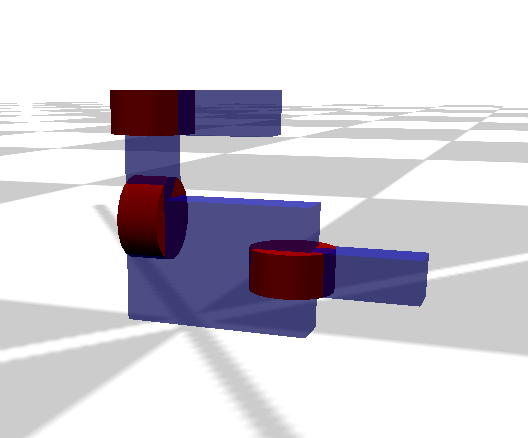
The robot_br2_example.js should produce the following:
Additionally, a correct implementation will be able to interactively highlight joints by uncommenting the following in 3jsbot.js:
/*
    // initialize the active link/joint for control
    active_link = robot.base;
    active_joint = robot.links[active_link].children[0];
    //robot.links[active_link].geom.material.wireframe = false;
    //robot.links[active_link].geom.material.opacity = 0.5;
    robot.joints[active_joint].display_geom.material.wireframe = false;
    robot.joints[active_joint].display_geom.material.opacity = 0.5;
*/
This will allow you to move up and down the kinematic hierarchy with the "k" and "j" keys, respectively. You can also move between the children of a link using the "h" and "l" keys.
For turning in your assignment, create a branch in your repository labeled "Assignment-4".
Assignment 5: Forward Kinematics: Quaternions
Due 9am, Monday, March 23, 2015
UPDATE: Due 9am, Monday, March 30, 2015
For this assignment, you will now add motor rotation to your robot from the previous assignment along with PID control from earlier assignments. You will implement angular rotation about each joint axis using quaternions for axis-angle rotation. You should create an "angle" property for each joint that is initialized as zero for rotation about the normal vector specified in the "axis" field. The rotation due to joint angles should be accounted for in the robot's forward kinematics and implemented as quaternions in "3jsbot_quaterion.js". Remember to uncomment the include of "3jsbot_quaterion.js" in "home.html" and the joint rendering cylinder rotation in "3jsbot.js".
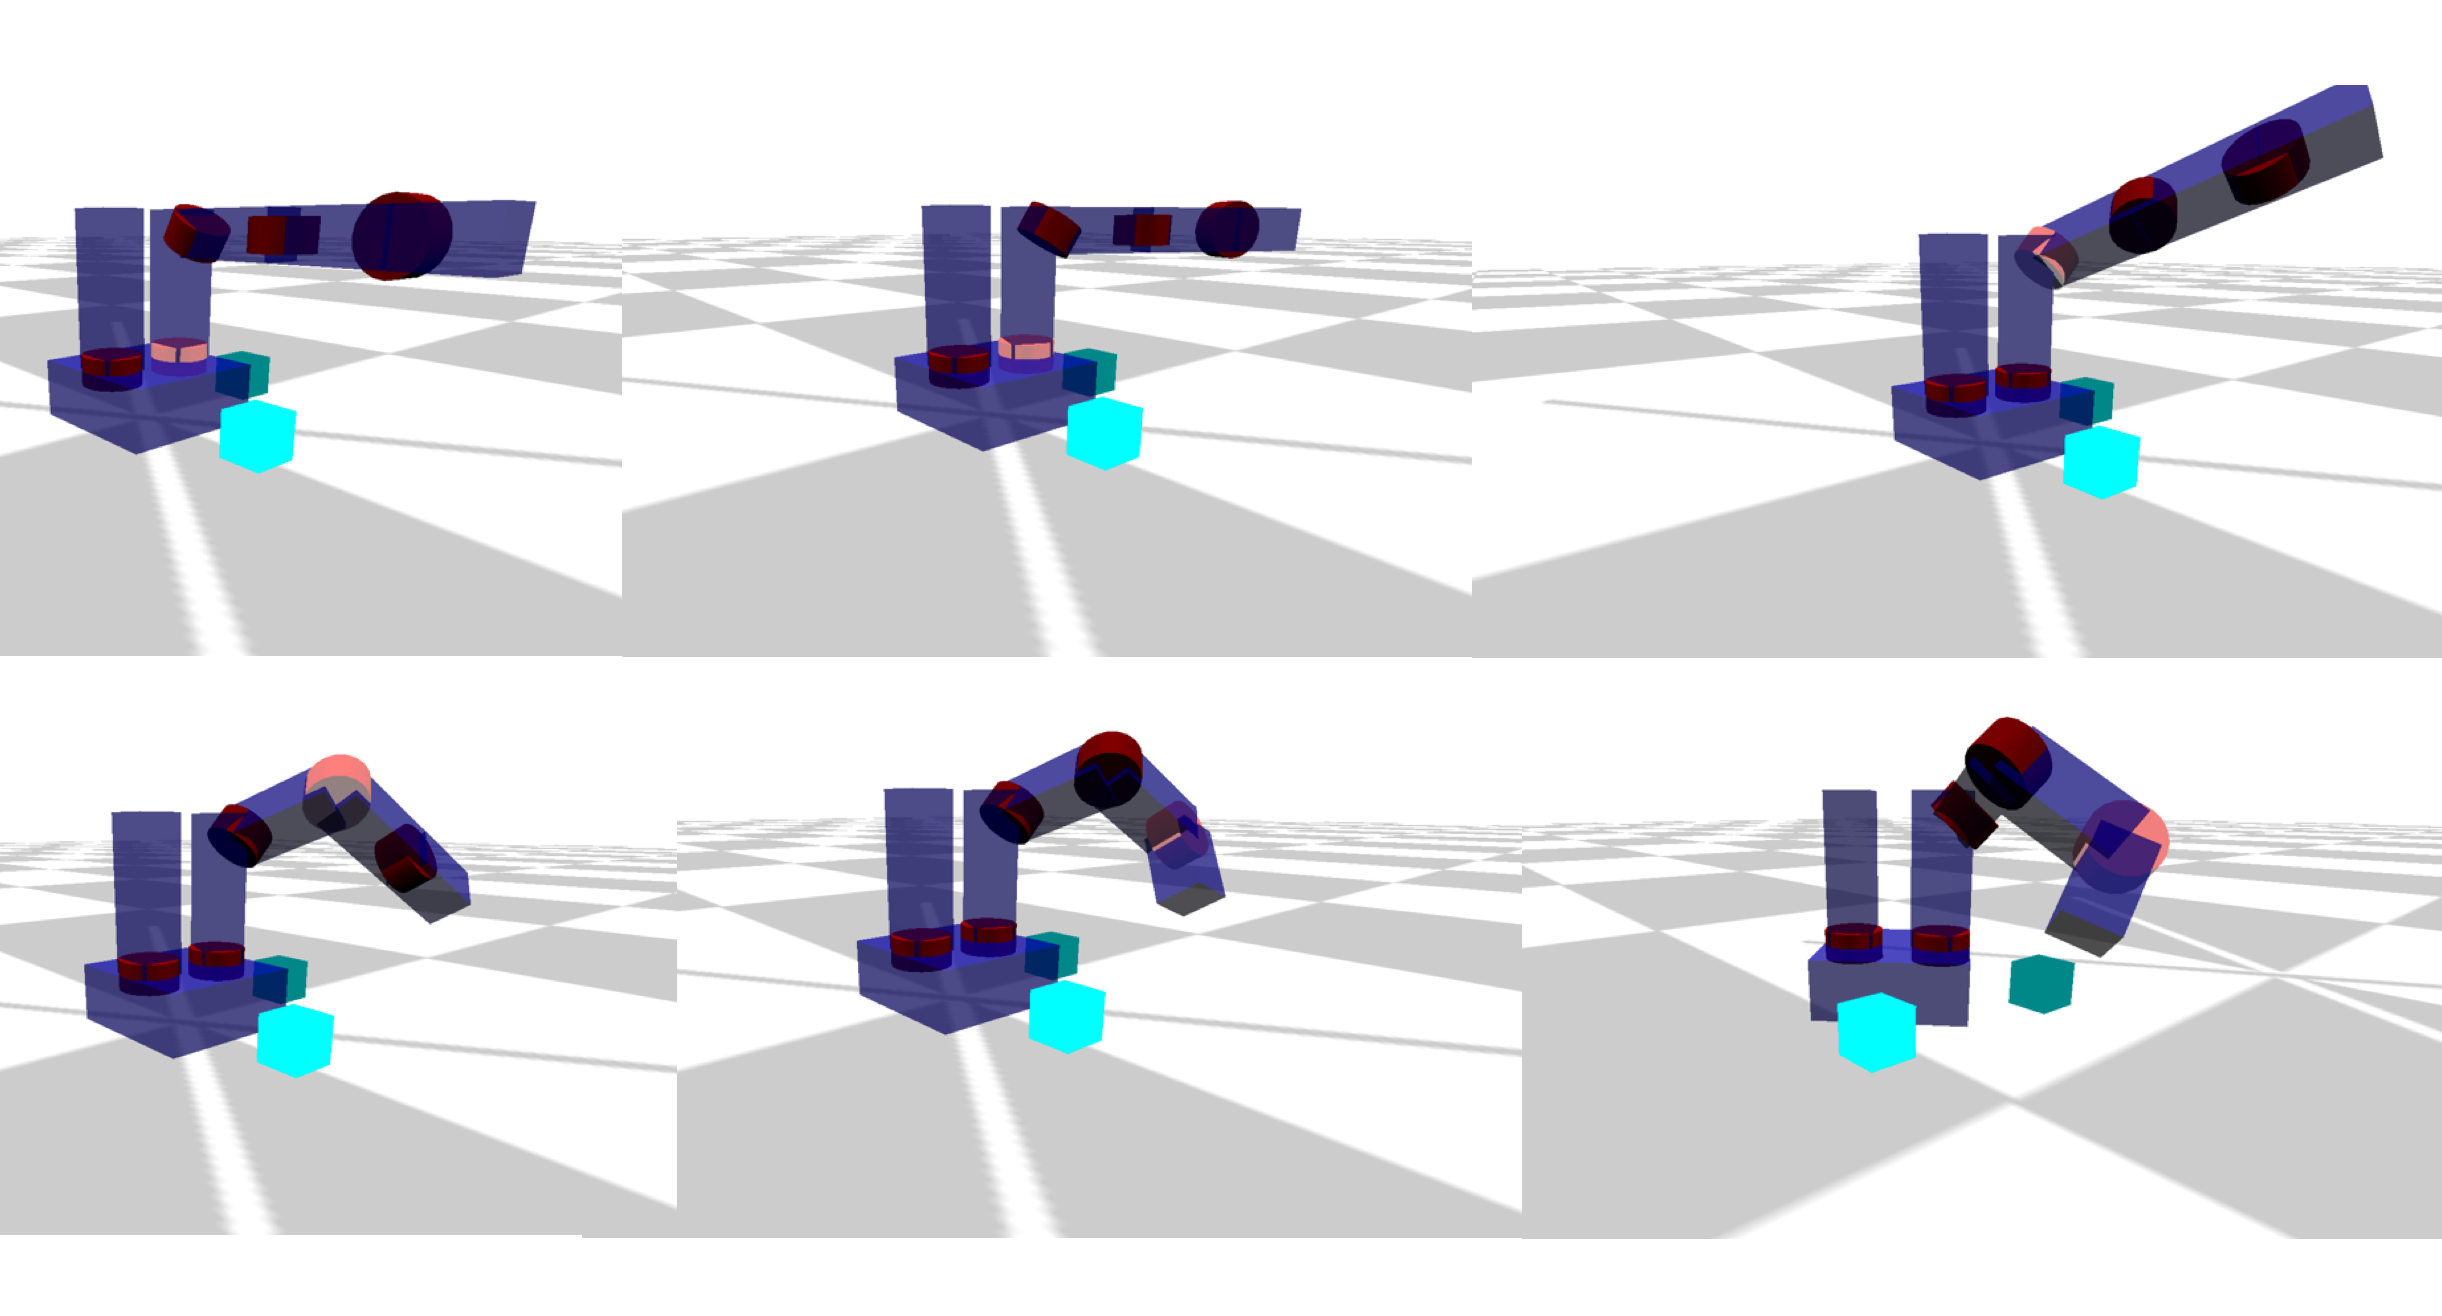
Once joint axis rotation is implemented, you will implement movement controls and PD control for the robot. You should create an "control" property for each joint and global DOF that is initialized as zero, and a "servo" property with PD gains and desireds. In "home.html", you should uncomment the function call to robot_apply_controls() and code segment around robot_pd_control(), and implement these functions respectively in "3jsbot_controls.js" and "3jsbot_pd_control.js".
robot_apply_controls(): Assuming simple non-Newtonian physics, robot_apply_controls() should simply add the controls to the joint angle state (contained in the robot.joints[x].angle fields) and global pose (contained in the robot.origin field) of the robot. Assume the base of the robot will be restricted to the ground plane. The following patch can be used in your main FK routine (such as through the compute_and_draw_heading() function) to create the rendering geoms for the robot's forward and lateral directions in the ground plane:
        if (typeof heading_geom === 'undefined') {
            var temp_geom = new THREE.CubeGeometry(0.3, 0.3, 0.3);
            var temp_material = new THREE.MeshBasicMaterial( {color: 0x00ffff} )
            heading_geom = new THREE.Mesh(temp_geom, temp_material);
            scene.add(heading_geom);
        }
        if (typeof lateral_geom === 'undefined') {
            var temp_geom = new THREE.CubeGeometry(0.3, 0.3, 0.3);
            var temp_material = new THREE.MeshBasicMaterial( {color: 0x008888} )
            lateral_geom = new THREE.Mesh(temp_geom, temp_material);
            scene.add(lateral_geom);
        }
The placement of these geoms can then be set using simpleApplyMatrix():
        simpleApplyMatrix(heading_geom,heading_mat);
        simpleApplyMatrix(lateral_geom,lateral_mat);
robot_pd_control(): For controlling the joint angles, robot_pd_control() should implement a simple proportional-derivative controller that updates to the desired angle of all joints based on the seconds of the system clock. This controller provides a simple means to test that controls for all joints are working. The following code snippet shows how to get the current system time and seconds, and scale this value to span the range (0..2*Math.PI).
    var curdate = new Date();
    curdate.getSeconds()/60*2*Math.PI;
For user input, you should be able to use the 'u' and 'i' keys to decrement and increment the rotation angle the selected joint, 'wasd' keys to move the robot on the ground plane, 'q' and 'e' keys for lateral base movement, and hold down the 'o' key to servo based on the system seconds.
For turning in your assignment, create a branch in your repository labeled "Assignment-5".
Assignment 6: Inverse Kinematics
Due 9am, Monday, April 13, 2014
For this assignment, you will now control your robot to reach to a given point through inverse kinematics for position control of the robot endeffector. Inverse kinematics will be implemented through both the Jacobian Transpose and Jacobian Pseudoinverse methods, although only one will be invoked at run-time. The core of this assignment is to complete the robot_inverse_kinematics() function invoked from home.html. This function will be called with three arguements: the variable ik_target (used by 3jsbot_userinput.js) to specify the IK target location in the world frame, the name of the joint directly connected to the endeffector, and the location of the endeffector in the local joint frame. The following is an example of invoking robot_inverse_kinematics():
robot_inverse_kinematics(ik_target, "forearm_right_yaw", [[0],[0],[0.5],[1]]);
The top level of robot_inverse_kinematics is provided below, and is the beginning of your implementation in the file 3jsbot_inverse_kinematics.js:
function robot_inverse_kinematics(target_pos, endeffector_joint, endeffector_local_pos) {
    // compute joint angle controls to move location on specified link to Cartesian location
    if (update_ik) {
        iterate_inverse_kinematics(target_pos, endeffector_joint, endeffector_local_pos);
        endeffector_geom.visible = true;
        target_geom.visible = true;
    }
    else {
        endeffector_geom.visible = false;
        target_geom.visible = false;
    }
    update_ik = false;

}
This code stub contains clauses to handle rendering of the endeffector (endeffector_geom) and target (target_geom) geometries and when to perform IK iterations (which occurs while holding down the 'p' key through 3jsbot_userinput.js). Both endeffector_geom and target_geom have been previously created by 3jsbot, so your code only needs to set the transform using simpleApplyMatrix() for proper rendering. Further, the 'r'/'f' keys will move the target location up/down, respectively.
In implementing this IK routine, please remember the following:
- Computation of the Jacobian should only occur with respect to the joints along the chain from the endeffector joint to the robot base
- The location of the endeffector needs to be computed using transforms resulting from the robot's forward kinematics
- Matrix inversion can be invoked by using the provided routine numeric.inv(mat), available through numericjs
- The computed velocity in configuration should be applied to the robot through the joint.controls field of each joint
- This assignment is only for positional control of the robot endeffector with respect to computing IK error
For turning in your assignment, create a branch in your repository labeled "Assignment-6".
Assignment 7: Motion Planning
Due 9am, Wednesday, April 29, 2015

For this assignment, you will now implement a collision-free motion planner to enable your robot to navigate from a random configuration in the world to its home configuration (marked by the "X" on the world floor). Motion planning will be implemented through the RRT-Connect algorithm (described by Kuffner and LaValle). The core of this assignment is to complete the robot_rrt_planner_init() and robot_rrt_planner_iterate() in the provided 3jsbot_rrt_connect.js stencil. For successful execution, your implementation of RRT-Connect, the provided collision detection system, and a single specification of world geometry will need to be included in home.html:
<--


-->
To ensure these worlds are rendered in the display, the geometries of the world are added to the threejs scene by calling robot_set_planning_scene() in home.html at the end of the init_robot() function:
function init_robot() {
    ...
    // set scene for planner
    robot_set_planning_scene();
}
Note: your planner should be constrained such that the search does not consider configurations where the base is outside the X-Z plane. Specifically, the base should not translate along the Y axis, and should not rotate about the X and Z axes.
First step: add collision detection
Your RRT-Connect implementation will depend on detection of collisions (provided by the function robot_collision_test() in 3jsbot_collision.js) with respect to a specified world geometry. Worlds are specified as a rectangular boundary and sphere obstacles. A collection of worlds are provided in the "worlds/" subdirectory of 3jsbot_stencil. The collision detection system performs two forms of tests: 1) testing of the base position of the robot against the rectangular extents of the world, and 2) testing of the robot configuration against spherical objects. Configuration collision testing is performed by AABB/Sphere tests that require the bounding box of each link's geometry in the coordinates of that link. This bounding box is computed by adding the following within the loop inside init_robot_links_geoms() in 3jsbot.js:
        // bounding box of robot link in local link coordinates
        robot.links[x].bbox = new THREE.Box3;
        robot.links[x].bbox = robot.links[x].bbox.setFromPoints(robot.links[x].geom.geometry.vertices);
Even before your planner is implemented, you can use the collision system interactively with your robot. The provided robot_iscollision() function will test the the current configuration of the robot. If a collision occurs, the base of the robot will be displayed as a solid red. The call to robot_iscollision() should be placed within my_animate() in home.html:
    // show if robot is currently in collision
    robot_iscollision();

Updating 3jsbot_collision for your implementation
You will need to modify the forward kinematics calls in 3jsbot_collision.js. 3jsbot_collision.js uses matrix and quaternion calls based on the reference implementation (i.e., my code). Your matrix and quaternion calls likely have a different structure to the function arguments and returned data structures. You should either:
- 1) modify calls to matrix/quaternion routines to fit your functions, or
- 2) use a modified version of your own FK with the collision test added to the link traversal function (remember: you need the inverse of the matrix stack for collision testing in a link frame)
Also, you can feel free to use numeric.inv() instead of matrix_invert_affine(). Affine transforms can be inverted (in constant time) through a much simpler process than the generic matrix inversion, which is O(n^3) for Gaussian elimination.
If successful to this point, you should be able to see the collision world of the robot, move around this world, and see the base display solid red when a collision occurs.
Invoking the planner
Your planner will be invoked interactively by first moving the robot to an arbitrary non-colliding configuration in the world and then pressing the "m" key. The "m" key will request the generation of a motion plan. While the planner is working, it will not accept new planning requests. Thus, you can move the robot around while the planner is executing.
Invokation of the planner is implemented by adding the following code segments to:
- init_robot() in home.html:
// initialize flags for executing planner generating_motion_plan = false; generate_motion_plan = false; - my_animate() in home.html:
// configuration space motion planning if ((generate_motion_plan) && (!generating_motion_plan)) { robot_rrt_planner_init(); generating_motion_plan = true; generate_motion_plan = false; } if (generating_motion_plan) { //robot_rrt_connect(q_desired); rrt_result = robot_rrt_planner_iterate(); if (rrt_result === "reached") { //alert("home: reached"); generating_motion_plan = false; } } - user_input() in 3jsbot_userinput.js:
    // generate motion plan
    if ( keyboard.pressed("m") )
        generate_motion_plan = true;
    else
        generate_motion_plan = false;
Planner output
The output of your planner will be a sequentially ordered array (named robot_path[]) of RRT vertices, where each RRT vertex contains a robot configuration (.vertex), an array of edges (.edges), and a threejs indicator geometry (.geom). The 3jsbot_rrt_connect.js stencil has provide routines that describe how new vertices can be added to the RRT. One a viable motion plan is found, this path can be highlighted by changing the color of the RRT vertex geom indicators, similar to the following:
robot_path[i].geom.material.color = {r:1,g:0,b:0};
The user should should be able to interactively move the robot through the found plan. After adding the following code below to user_input() in 3jsbot_userinput.js, the "n" and "b" keys to move the robot to the next and previous configuration in the found path, respectively.
    // traverse generated motion plan
    if ( keyboard.pressed("n") |  keyboard.pressed("b")) {
        if (typeof robot_path !== 'undefined') {

            // increment index
            if ((keyboard.pressed("n"))&&(robot_path_traverse_idx < robot_path.length-1))
                robot_path_traverse_idx++;

            if ((keyboard.pressed("b"))&&(robot_path_traverse_idx > 0))
                robot_path_traverse_idx--;

             // set angle
            robot.origin.xyz = [
                robot_path[robot_path_traverse_idx].vertex[0],
                robot_path[robot_path_traverse_idx].vertex[1],
                robot_path[robot_path_traverse_idx].vertex[2]
            ];

            robot.origin.rpy = [
                robot_path[robot_path_traverse_idx].vertex[3],
                robot_path[robot_path_traverse_idx].vertex[4],
                robot_path[robot_path_traverse_idx].vertex[5]
            ];

            for (x in robot.joints) {
                //q_names[x] = q_start_config.length;
                robot.joints[x].angle = robot_path[robot_path_traverse_idx].vertex[q_names[x]];
            }
        }
    }
Testing

Make sure to test from a reasonable set of robots and initial configurations within all of the provided worlds, ensuring that:
- a valid non-colliding path is found and can be traversed
- the robot does not to take steps longer than 1 unit
- the robot base does not move outside the X-Z plane. Specifically, the base should not translate along the Y axis, and should not rotate about the X and Z axes.
The "br2" robot should be able to navigate all of the provided worlds.
Optional: HTML5 Canvas Stencil

Using the browser for as a development environment has many benefits. However, when coding mistakes occur, it will make the browser lock up and be completely unusable. This becomes even worse when the overhead of rendering with threejs is involved.
To help you get started, the code stencil also has a "rrt_canvas" directory where you can implement your RRT in 2D worlds with provided routines for visualization and collision. Because the RRT is invariant across configuration spaces, an RRT developed for the 2D Canvas world should easily port to the N-D threejs world, with minor changes for invoking drawing routines.
For turning in your assignment, create a branch in your repository labeled "Assignment-7".
Assignment 8: The best use of robotics?
Due 3pm, Monday, May 4, 2015
Scenario: An investor is considering giving you 3 million dollars (cold hard USD cash, figuratively). This investor has been impressed by work with 3jsbot and other accomplishments while at Brown. They are convinced you have the technical ability to make a compelling robot technology... but, they are unsure how this technology could produce something useful. Your task is to make a convincing pitch for a robotics project that would yield a high return on investment.
You will get 2 minutes to make a pitch to develop something useful with robots. Consider the instructor and your classmates as the people that need to be convinced. As a guideline, your pitch should address an opportunity (presented by a need or a problem), your planned result (as a system, technology, product, and/or service), and how you will measure successful return on investment. Return on investment can be viewed as financial profit (wrt. venture capital), good for society (wrt. a government program), creation of new knowledge or capabilities (wrt. a grant for scientific research). Remeber, the purpose is to convince and inspire about what is possible, rather than dive into specifics.
The last scheduled class period (Monday May 4th, 3-5pm) will be dedicated to student presentations to pitch ideas on the best use of robotics. Please email your slides to the instructor before 9am on April 30th with the subject line ("cs148 asgn8 pitch slides"). OS X Keynote will be used as the sole means of slide presentation, and will be timed and controlled by the instructor. As such, slide materials can be accepted as Keynote, Powerpoint (no guarantees on conversion), PDF, and common image and video formats (JPG, PNG, MP4, FLV, etc.).
The pitch judged to be the most convincing will get first dibs.
